
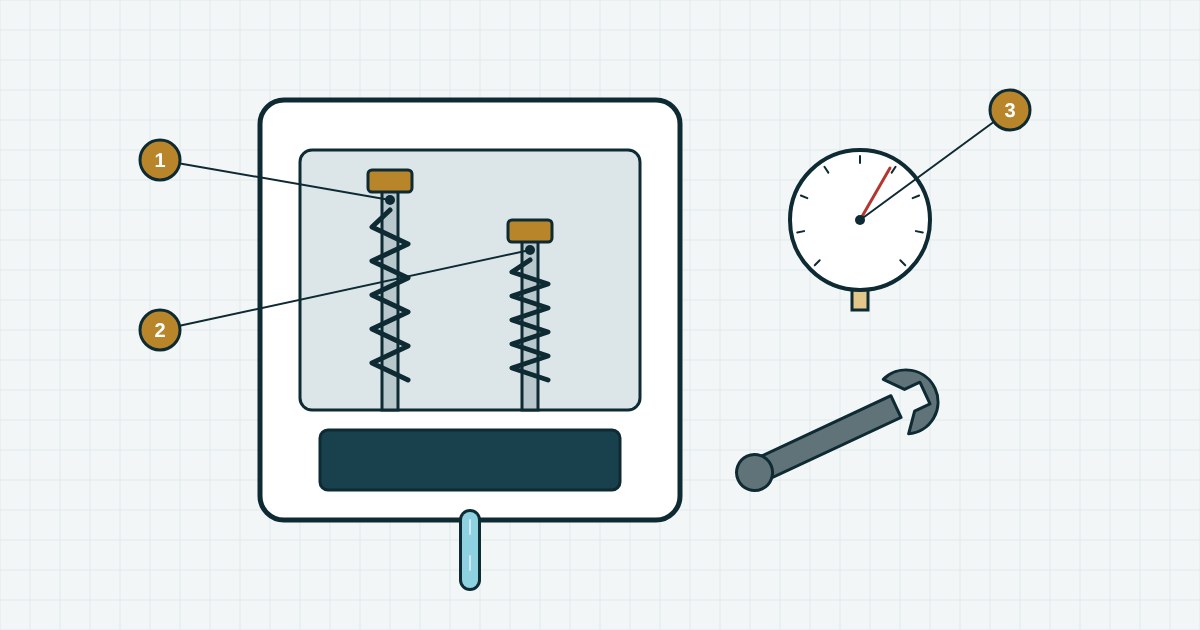
A pressure switch starts the pump when the system pressure drops and stops it when the pressure reaches the upper limit. Factory settings are usually 1.4–2.8 bar. If the pressure is not enough for the first floor or, on the contrary, the pipes hum, you can re-adjust the switch in 20 minutes.
What the diagram shows
1 — the large spring that sets the cut-in pressure, 2 — the small spring that sets the difference between cut-in and cut-out, 3 — the gauge used to check the result.
How the nuts work
- The large nut turned clockwise raises both the cut-in and the cut-out pressure.
- The small nut turned clockwise widens the difference — it raises only the cut-out pressure.
The difference is usually 1–1.5 bar. Less, and the pump starts too often; more, and you will notice the pressure swings.
Step by step
- Open a tap and watch the gauge: note the pressure at which the pump starts. Close the tap and note the pressure at which it stops.
- Isolate the pump from the mains and remove the switch cover. There are live contacts inside — work only with the power off.
- Turn the nut you need by half a turn. Half a turn is roughly 0.2–0.3 bar.
- Refit the cover, switch the power on and check both pressures on the gauge again.
- Repeat until you get what you need, for example 1.8–3.0 bar.
- Drain the water and re-adjust the air in the pressure tank to 0.2–0.3 bar below the new cut-in pressure.
If the switch sticks
A common cause is a clogged switch inlet: sand and rust get into it. Remove the switch and clean the inlet and the diaphragm. If the contacts are burnt, a new switch is cheaper — find one in our pump controls section.