
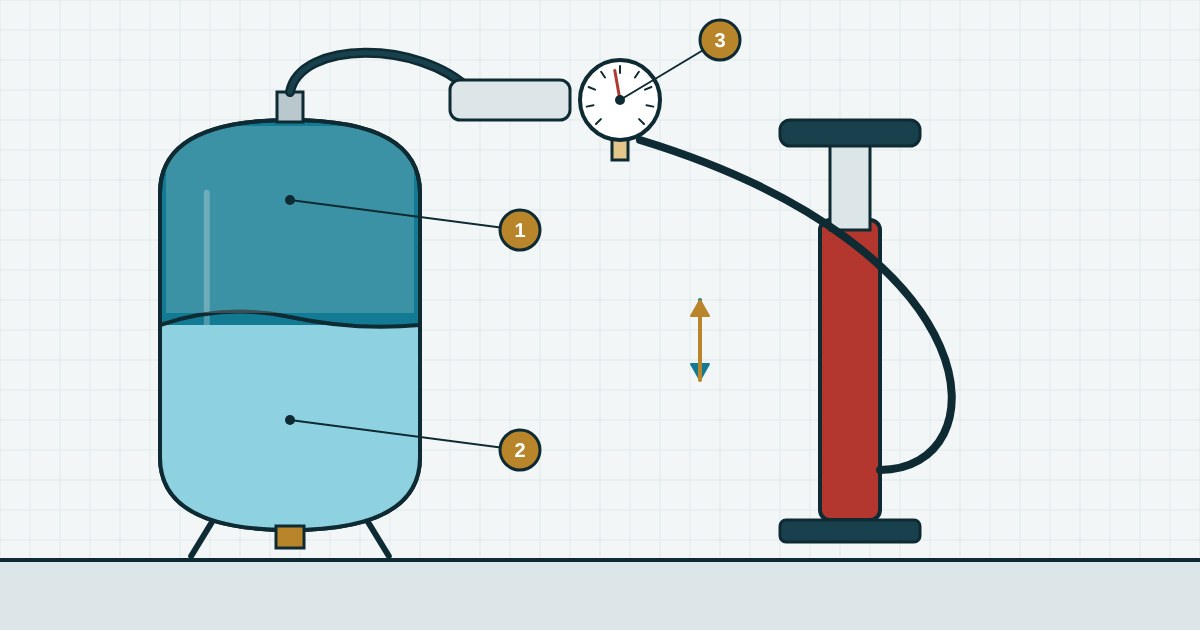
If the pump has started switching on too often and the flow from the tap “pulses”, check the air in the pressure tank first. Air slowly escapes through the diaphragm and the valve, so it is worth checking every six months. All you need is a tyre gauge and a hand or car pump — about 15 minutes of work.
What the diagram shows
1 — the air chamber above the diaphragm, 2 — water below the diaphragm, 3 — the gauge on the air valve. The air charge is measured only when the water side is empty.
Step by step
- Disconnect the pump from the mains — switch off the breaker or unplug it.
- Open the tap closest to the tank and wait until the water stops. The system gauge should read zero.
- Remove the cap from the air valve (usually on the top or side of the tank) and measure the pressure with a tyre gauge.
- Compare it with the pump cut-in pressure on the pressure switch: the air should be 0.2–0.3 bar lower. If the switch starts the pump at 1.5 bar, the tank needs 1.2–1.3 bar.
- Pump air in or release it by pressing the valve core. Check again with the gauge.
- Close the tap, switch the pump on and note the pressure at which it stops.
Signs of a failed diaphragm
- Water sprays out of the air valve when you press it — the diaphragm is definitely torn.
- You have to top up the air every week.
- The tank sounds equally dull from top to bottom when you tap it.
In flanged tanks the diaphragm can be replaced in an hour: remove the flange, pull out the old bladder and fit a new one of the same size. If the diaphragm is fixed, the tank has to be replaced — choose a new one among our pressure tanks.
How often to check
Every six months and whenever the pump starts short-cycling. Write the date and the reading on the tank with a marker — that makes it easier to notice that the air is escaping faster than usual.