
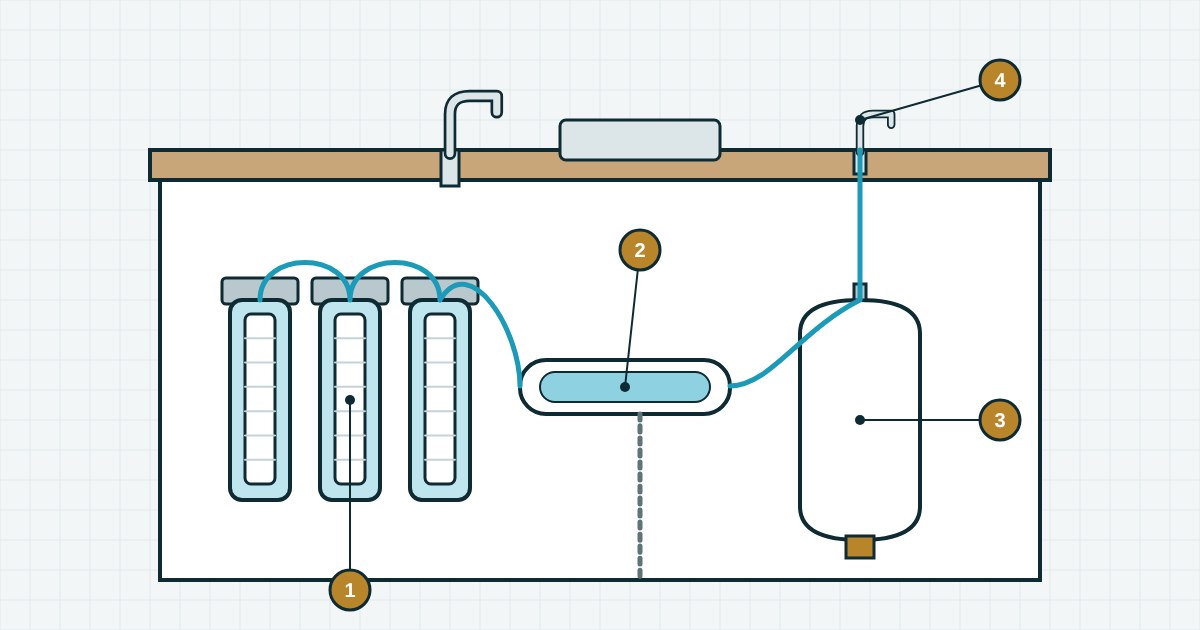
A reverse osmosis system gives you clean drinking water from a dedicated faucet in the kitchen. You can install it yourself in 1.5–2 hours: everything connects with plastic tubing and push-fit fittings, no soldering needed.
What the diagram shows
1 — pre-filter housings (sediment and carbon), 2 — the reverse osmosis membrane, 3 — the storage tank, 4 — the separate faucet for purified water.
Before you start
- Inlet pressure must be at least 2.5–3 bar. Below that the membrane produces little water and you will need a booster pump.
- Space under the sink for an 8–12 L tank and the filter block.
- A drill bit for the faucet hole (usually 12 mm) in the sink or worktop.
Step by step
- Shut off the cold water and release the pressure by opening a tap.
- Fit the feed adapter to the cold water line under the sink and connect the system inlet tube to it.
- Clamp the drain saddle onto the sink waste pipe above the trap. The membrane flushes salt-laden water through it.
- Install the faucet on the sink or in a hole in the worktop.
- Fix the filter block to the cabinet wall and place the tank.
- Connect the tubes: inlet, drain, tank, faucet. Push each tube all the way in; remove the locking clip only to disconnect.
- Turn the water on and check every joint for leaks.
First start-up
Drain the first full tank — this flushes the carbon filters and the membrane preservative. The air pressure in the empty tank should be 0.4–0.5 bar: check it if the tank holds too little water.
Replace the pre-filters every 3–6 months, the post-filter once a year and the membrane every 2–3 years. If the pre-filters are not changed on time, the membrane clogs much sooner.
Replacement tanks and parts are in our reverse osmosis tanks section.