
In spring and after heavy rain, water can come into the basement every year. While you look for the cause and waterproof the walls, the water has to be pumped out — preferably automatically, so you do not have to stand guard with a bucket.
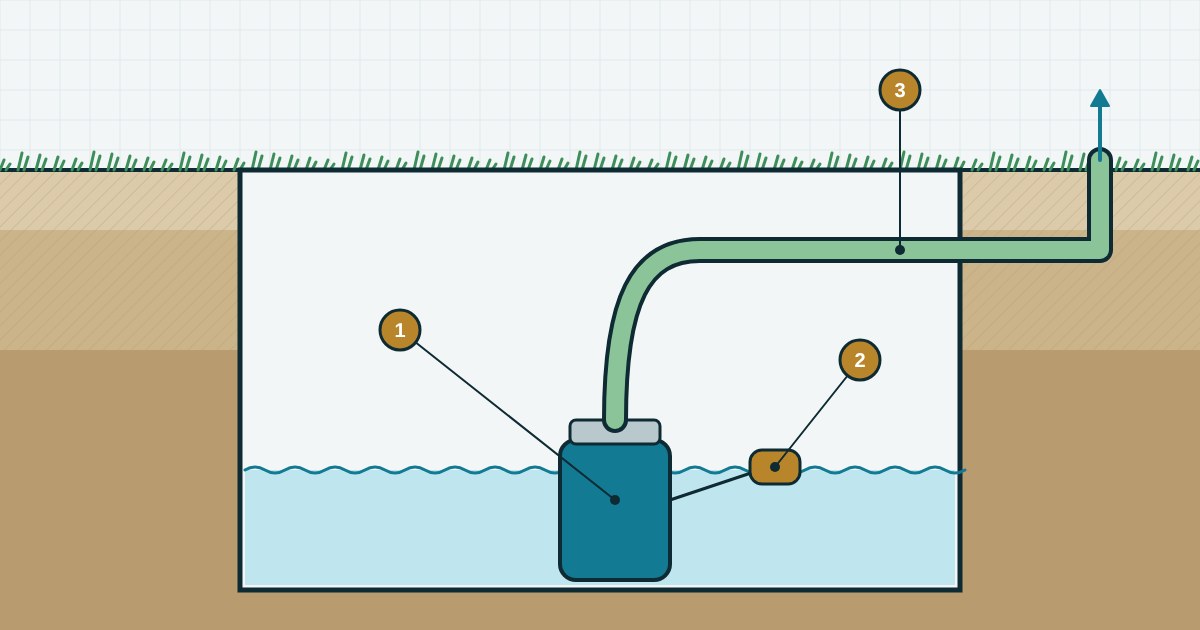
What the diagram shows
1 — the drainage pump, 2 — the float switch, 3 — the discharge hose led away from the house.
Which pump you need
- For clean or slightly dirty water (snowmelt, groundwater) — a drainage pump handling particles up to 5–10 mm.
- For dirty water with silt and sand — a dirty-water pump passing particles of 25–35 mm.
- Head — the basement depth plus the hose length (1 m of head per 10 m of hose) plus a margin. Usually 7–10 m is enough.
- A float switch — essential if the pump has to work by itself.
DIY automatic pumping
- Make a sump pit at the lowest point of the floor — about 50×50×50 cm, with the walls lined with a concrete ring or concrete. Water will collect there.
- Put a brick or a tile on the bottom of the pit and stand the pump on it — it will suck up less silt.
- Adjust the float cable length: the pump should start before the water rises out of the pit and stop while a little water still covers the casing.
- Connect the discharge hose or pipe and fit a check valve on the outlet so the water in the hose does not run back.
- Discharge the water well away from the foundation: into a storm drain, a ditch or lower ground — but not towards the neighbours.
- Connect the pump through an RCD — in a basement with water it is a must.
The float must not catch on the pit walls or the cable — otherwise the pump will run dry or not start at all.
Test it once a season: pour water into the pit and make sure the pump starts and stops by itself. See our pumps section for drainage pumps.